Friday, January 25, 2013

Wait for it... Mac n' Cheese Casserole

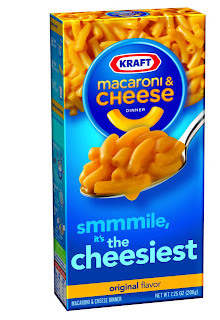
Ok, confession time... Kraft Mac n' Cheese in the blue box is my all time favorite mac n' cheese. I am not saying that others are not tasty, I am just saying I love the stuff in the blue box.
Kraft Macaroni & Cheese
I have never made homemade mac n' cheese until now. Again, I was trolling through my mom's cookbook looking for something tasty to make and she has sworn that her mac n' cheese casserole was divine- better than the blue box stuff. Honestly, comparing the blue box mac n' cheese to home-made mac n' cheese is like comparing a Granny Smith Apple to a Golden Delicious Apple- alike in some ways but waaaay different in others. None-the-less, I decided to give her mac n' cheese casserole recipe a whirl.

The ingredients are as follows: 
  • 16 ounces of uncooked macaroni
  • 2 (10.75 ounce) cans of cream of chicken soup
  • 2 cups of mayo
  • 4 cups of shredded cheddar cheese
  • salt and pepper to taste
  • 1.5 sleeves Ritz crackers, crushed
  • 1/2 cup butter (or margarine), melted
Homemade Macaroni & Cheese Ingredients

(I shop at Sam's Club and buy certain things in bulk- yep, like Kraft mac n' cheese in the blue box, so for this recipe, I used the noodles and saved the cheese packets for later.)

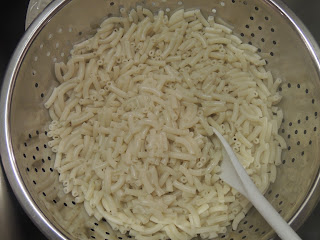
Cook your macaroni according to the directions and drain.
Cook Macaroni and Drain

 While the macaroni is cooking, mix together the mayo, cream of chicken, cheese and salt and pepper.
Cheese Mixture

  Then combine the noodles with the cheese mixture and pour into a greased 9 x 13 Pyrex.
Noodles with the Cheese Mixture

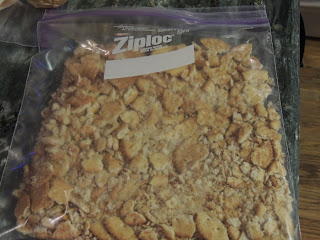
Put your Ritz crackers in a Zip Loc Bag and crush them and add your melted stick of butter and mash it all together.
Ritz Crackers & Stick of Melted Butter in Zip Loc

And cover the casserole with them and put it in the oven on 350 F for 30 minutes.
350 F for 30 Minutes

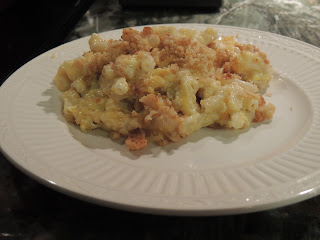
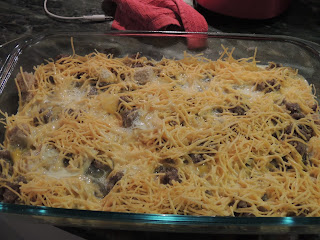
And then, drum roll please.... 
Macaroni & Cheese Casserole

Oh, it's good! It's real good. It's the best home-made macaroni and cheese I've ever had. There is simply no comparison between this and the blue box. This is divine. I have just one thing to say about this recipe, it is enough for Pharaoh AND his army. When this came out of the oven, Bub was standing there and his eyes got real big and he asked when everybody was coming over because we had a ton of mac n cheese! Next time, I'll only be cutting the recipe in half. 
Macaroni & Cheese Casserole:

  • 16 ounces of uncooked macaroni
  • 2 (10.75 ounce) cans of cream of chicken soup
  • 2 cups of mayo
  • 4 cups of shredded cheddar cheese
  • salt and pepper to taste
  • 1.5 sleeves Ritz crackers, crushed
  • 1/2 cup butter (or margarine), melted
Cook the macaroni according to directions, drain and set aside. Combine the next 4 ingredients and then fold in the macaroni and pour into a greased 9 x 13 Pyrex. Crush the Ritz and mix with the butter and pour over the casserole. Cook for 30 minutes on 350 F.


Thursday, January 24, 2013

Could it be Heaven on Earth? Chili Cheese Dog Casserole!

I love, love, love hot dogs! I love hot dogs with all the fixings and I love hot dogs with just mayo, mustard and ketchup. I love them grilled and I love them nuked in the microwave. I just love them- regular old hot dogs- not beef franks. Soooooo, when the Chili Cheese Dog Casserole came to my attention on Pinterest, I knew I would someday need to be making that! And that day finally came!

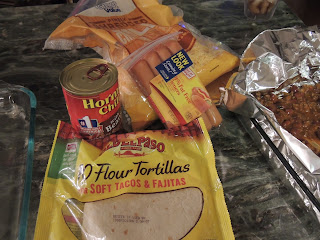
Here's what you need:

  • 1 pack of hot dogs
  • 1 pack of 8" flour tortillas
  • 2 cans of chili
  • 2 cups of cheese


Chili Cheese Dog Casserole ingredients
I had already spread one can on the bottom of 9 x13 Pyrex
The first step is spread one can of chili on the bottom of a 9 x 13 Pyrex. 

Chili on the Bottom


Commercial Break: Do you see how I have lined the Pyrex with aluminum foil? The reason being, I knew that baked on chili would be a biz-nich to get off that dish! But this way, I just pull the foil out of the Pyrex and throw it and the mess away. I would rather throw away and have thrown away dishes with cooked on food than scrub them. It blows my mind why this step is not just second nature to everybody! 

Next you roll your hot dogs in the flour tortillas and lay them seem down in the Pyrex.
Roll your Hot Dogs in the Flour Tortillas

And then cover the rolls with the other can of chili and the cheese on top of that.
Cover with other Can of Chili & Cheese

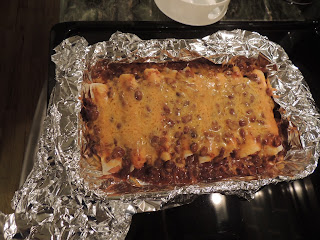
Cover it and bake it for 30 minutes at 425 F. And when it comes out of the oven it looks like this:
425 F for 30 Minutes

Does that not just look Heavenly? And mine looked pretty much like the original post- a good sign. Baby Bub was in bed and Bub and I sat down to dig in. Bub loves hot dogs almost as much as I so he was excited about this too. 

It was good but, it was not out of this world. It was good but, I'll never cook this again. It was good but, we both agreed we'd rather just have our chili cheese dogs the old fashioned way- in a bun. And we both agreed you never know until you try it. We tried it and now we know.

Best and Easiest Feta Cheese Dip: Everythings Betta with Feta!... assuming you like Feta cheese, that is... ~Leigh

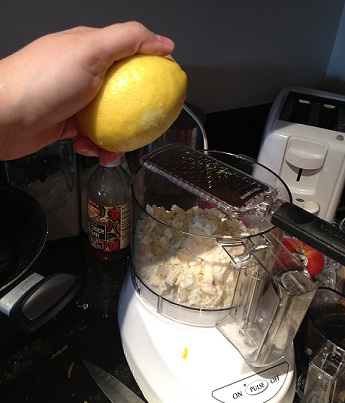
I found a pin on Pinterest that was titled, "Feta Dip" with "Everyone begs for the recipe" in the descriptor section. Everyone has different tastes, and Feta (like cilantro) is polarizing. I, personally, really like it and am always looking for a super easy something to whip up to take to knitting night, or any gathering. It doesn't get much easier than this, folks... especially if you have a food processor. The pin took me to a site called Sweet Paul Blog. You literally just dump all the ingredients into a blender or food processor and adjust to taste.


Easy Feta Cheese Dip
Through 'em all in and go!

From Sweet Paul Blog:
Lemon and feta dip
Serves 4

8oz feta cheese, crumbled
1 tablespoon grated lemon zest
2 tablespoons lemon juice
1 clove garlic, chopped
6 tablespoons olive oil+ extra for serving
fresh thyme


Place feta, lemon zest and juice, garlic and olive oil in a blender and blend until smooth.
Spoon into a bowl and drizzle with a little olive oil and sprinkle with thyme.
Serve with grilled tomatoes and grilled pita bread drizzled with olive oil, salt and thyme.


We have a policy in our house to pretty much double the garlic in any recipe and I used a little bit extra olive oil than the recipe calls for... so, again... this can be modified to suit YOUR tastes. I also didn't have any fresh thyme, though I bet that would be wonderful. I also didnt serve with grilled tomatoes... but I did serve it with pita chips. It was a super hit. And, yes... people asked for my recipe.

One quick note though... make sure to remove any lemon seeds that may have made their way in there during the squeezing process. I'm sure thats a no-brainer, but I'm just throwing that out there. If you have even a passing fondness for Feta, you should definetely check this out!

Thanks for reading!~ Leigh

The Upper Eschelon- Mrs. Kennedy and Me

I feel in love with books and reading in about the second grade all because a fictional freckled faced, red headed girl just fascinated me. And then I realized that I could pick up a book and go anywhere. If I was bored, I could read. I loved the Little House on the Prairie Series, the Babysitters Club Series, Emily of New Moon and Anne of Green Gables by LM Montgomery and I just loved Judy Bloom. Then in high school I found the romance novel- not Harlequins really, but Nora Roberts and Lyverl Spencer and Judith McNaught- all three excellent romance novelists. And then as I got a bit older my reading interest waned and finally reignited but shifted to non-fiction: self-help, autobiographies and biographies.

I really want Baby Bub to be a reader. I really want him to enjoy entertaining himself with books. I just think there are lots of good reasons to encourage him to read. It will help with his vocabulary and overall intelligence being 2 main reasons. I subscribe to an online baby/parenting community and they are constantly sending links to articles about every topic under the sun- one of them being reading. The article encouraged reading to babies starting in the womb and continuing in infancy and beyond. AND it says that it really does not mater what you read as long as you read because babies benefit from hearing the cadence of reading. Click here to read the article yourself.

Not that I don't love children's books because I do. We have already read the big book of Berenstain Bears several times. They were my favorite when I was little.
But, hey- if it doesn't matter what I read to Baby Bub, then I am going to take advantage of that while I can because I am sure he won't want me to read him my book forever. So, everyday I read to him while he eats and then falls asleep for his naps. 

Baby Bub is between me and the book- 
We just finished Mrs. Kennedy and Me by Clint Hill. 

Mrs. Kennedy and Me

I have to say, it was really good. It was well written and neither Baby Bub nor I wanted it to end. We just wanted Mr. Hill's narration to continue forever. Clint Hill was Mrs. Kennedy's assigned secret service agent while JFK was in office. Through his narration, it was just so easy to imagine yourself there, living with them- jet setting around the globe and in the end mourning the death of her husband and father of her children.

I came to realize several aspects about Jacqueline Kennedy that I had never even considered. Although I knew she was not a fan of the spotlight, I did not know to what lengths she went go to find privacy. While her husband was in office, she almost avoided being in Washington and at the White House simply because of the limited privacy there. And I knew that she was certainly a pop culture icon, but I was unaware of her international political influence.

Mr. Hill was with Mrs. Kennedy that infamous day in Dallas and actually clung to the back of the presidential limousine after the President was shot and was raced to the hospital. Hill blamed himself for JFK's death, although clearly, he could not have prevented it.

This book is absolutely worth the read. We both found it interesting. (However, sometimes Baby Bub just couldn't keep his eyes open and drifted off to la-la land often resulting in the need to go back and re-read a paragraph or two.)
Baby Bub


Can Pam Cooking Spray Help Dry Your Nails Quicker?

      
I’ve seen the tip on Pinterest several times now about spraying wet, polished nails with Pam cooking spray. Along with this, I’ve also seen the tip about placing your nails in cold water to aid in the drying process.

I am a nail biter and it is a habit I am forever trying to break. If my nails are painted, I am more likely to not bite them. I’ll go months without biting them and then a switch will flip and then that’s it- nail biter, again.

Well, the holidays are over and I actually have some down time and thought now would be the perfect time to get back on the no-bite train, paint my nails, and try out the above mentioned tip. The pin I used took me to an article on elle.com with all kinds of helpful hints- actually, the remainder of the article was probably more interesting than the ’spraying your hands with cooking lubricant’ bit.

As previously mentioned, when I’m in my “no-bitey” phase my fingernails are pretty much painted all the time. Which means I’ve done a lot of nails in my time.If you are wondering, my “process” starts with the whole cuticle soaking/trimming/pushing rigamarole then into Sally Hansen Hard As Nails as a base coat. Next comes several coats of whatever color- with a minute or so between coats- and then I apply a top coat. For my money, Seche Vite dry Fast Top Coat is the best I’ve found. Obviously, I have my own system that works best for me. But a promise of even FASTER dry nails was tempting.

The instructions, I guess, COULD have been more clear than “spray with Pam.” Who knew? So, I put my regular top coat on, not knowing whether the Pam replaces that step. And then I sprayed my nails with Pam and immediately realized… oh crap… I now have cooking lubricant all over my fingers. There were no suggestions as to how long to keep it on, or when to wash it off. I left it on for about two minutes… then gently washed it off with soap and water. I used my thumb as a test nail, so as not to ruin the ENTIRE manicure if things went south.


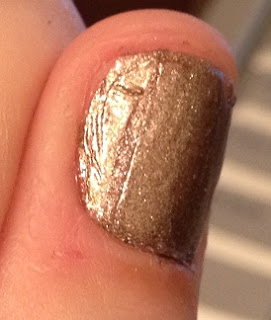
Pam Cooking Spray Nail Drying Shift
Tectonic Shift!

I don't know if you can see, but the entire top layer shifted like a techtonic plate. Glad I only tested it on my thumb. I was able to slide it back and kind of finesse it into normalcy, but I wasn't blown away by Pam's effectiveness. Plus, did I mention that you have to cover your fingers with Pam?

I waited a little longer for the rest of my nails and they dried fine... but, I think the only real "trick" to getting nails to dry is TIME and not touching them- the longer the better. No earth shattering reveal here... but at least I may prevent one person out there from getting Pam all over their kitchen faucet. So, did it work? The answer is a solid YES(?).


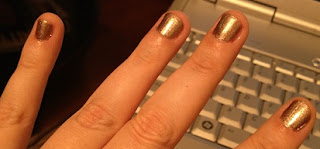
Pan Cooking Spray Nail Drying Final
Final Result? Shiny... but from Color or Cooking Spray?

Anyone out there got any tips on not biting their nails? I'll test the cold water submersion theory next and let yall know how that works! Science!

Wednesday, January 23, 2013

Rise and Shine & Get Your Sausage Casserole On!

Breakfast is important! Some mornings I can't get breakfast ready fast enough. Breakfast is important because it gets your metabolism kicking- and who doesn't want their metabolism kicking?! But, here's the deal: Bub's work week schedule is never the same. He may go to work at 8AM one day and 2PM the next- so, some days it's no sweat to get up and make breakfast; others not so much. This week was one of those weeks where he had to be at work fairly early most of the week. Getting up at 5:30AM to cook him breakfast... wellllll, that just isn't going to happen. That does not mean I do not want him to have a good breakfast though- so, I decided to cook a breakfast casserole at night that he could just warm up the next morning.

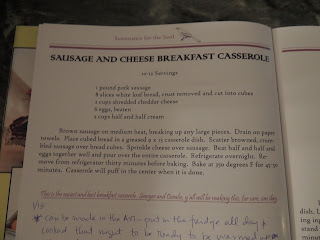
It is at this time that I must confess a little something. My Moma just published a cookbook with basically all the recipes from my childhood and her catering career. It is much like a treasure trove of recipes. I have always had access to the the recipes but not like this- not all in one place, nice and neat. So, I have been trying my hand at the dishes in Moma's cookbook.

Mary Made It!
So, when Bub told me he'd be working a bunch of early mornings this week, I knew it was time to try out the Sausage, Egg & Cheese Breakfast casserole
Mary Made It!
Are you wondering why I wrote in the book? I always take notes in cookbooks or any book for that matter- it goes back to my English major days. In cookbooks I take note of things like if it needs more sauce, how good it is or if you can make substitutions. In this case, the directions say to let it chill in the fridge over night and then set it out on the counter for 30 minutes before cooking it for 45 minutes. Uh, back to getting up at 5:30AM to cook breakfast- yeah, no. So, I noted that this could be made in the morning, let chill in the fridge all day, cooked after super and then Bub could heat a piece in the morning.

This recipe only calls for 5 ingredients- it's super easy and super delish too.

  • 1 pound pork sausage
  • 6 eggs
  • 2 cups half & half
  • 6 slices of white bread, crust off and cubed
  • 2 cups of cheese
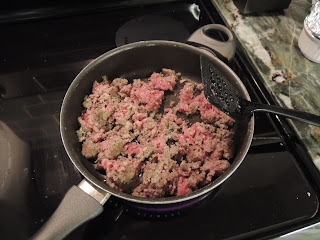
First thing, brown your sausage
Brown Your Sausage

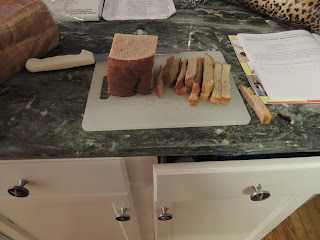
and while that's happening, cut the crusts of your bread off and cut it into cubes

Cut the Crusts Off and Cube Bread

and combine your 6 eggs and 2 cups of half & half

Eggs and Half & Half

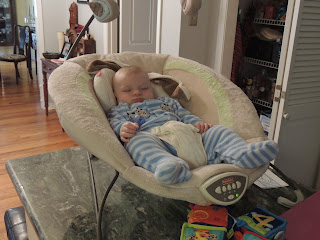
Here is another bit of advice, when you are reviewing applications and interviewing for sous chefs, make sure to ask if they are well rested because they are not much help when they sleep on the job!

Sous Chef Asleep on the Job!


Anyway, once you have browned your sausage, cubed your bread and beaten and combined your eggs and half & half. Spray a 9 x 13 pyrex with cooking spray and spread your bread cubes on the bottom, cover that with the sausage and the sausage with the cheese and finally pour your egg mixture over the entire thing.

Sausage, Egg & Cheese Casserole- Ready to Soak

Cover it and let it chill in the fridge for at least 6 hours or over night.

Sausage, Egg & Cheese Casserole- Chilling

Then, when you get ready to cook it set it out on the counter for 30 minutes. I let it set out while the oven was preheating to 350F. Cook it for 45-55 minutes. It will puff up around the edges and then in the middle, and when it puffs up in the middle, you will know it's fully cooked.

Sausage, Egg & Cheese Breakfast Casserole

It smelled so good coming out of the oven! And although we didn't eat it until the next morning- it was still very tasty!

To recap, here is the entire recipe:

  • 1 pound pork sausage
  • 6 eggs
  • 2 cups of cheese
  • 2 cups of half & half
  • 6 slices of bread, crust removed and cubed
Brown and drain the sausage. Combine the eggs and half & half. Cut the crust off the bread and cube it. Spray the bottom of a 9 x 13 pyrex and spread the bread cubes on the bottom with the sausage and cheese layered on top. Pour the egg mixture over it all, cover the pyrex and put it in your fridge overnight (or all day). When you are ready to cook it, let it sit out for 30 minutes while your oven heats to 350 F. Cook it for 45-50 minutes.


Tuesday, January 22, 2013

Cling Wrap to Prevent Toiletry Explosions while Traveling!

I travel (by plane) more than some, but not as much as others. I can't count the number of times that the changes in altitude or general jostling of baggage handlers have made beauty products (shampoo, body gel, etc.) explode in my bag. Because of this, I've been tightening my lids, saying a prayer, and then bagging all my stuff in ziploc bags for years. Bagging your stuff prevents product from getting all over your clothes and stuff... but it doesn't prevent wasting product or the general mess of having a ziploc bag and all of its contents covered with conditioner. So, this may SEEM like a no brainer, but I hadn't put it together until I saw a post on Pinterest and NOW I wont travel without doing simple, simple trick- Saran Wrap (or any other clear, cling wrap).


Just unscrew the top, place saran wrap over the opening, and then screw it back up. Initially, I was worried that the lid wouldn't screw back on right with the saran wrap covering the treads, but I was completely proved wrong. When you arrive at your destination, you just remove the cling wrap... save it, and you can use it on your return trip. You don't need a TON of cling wrap... just enough... but, MAN the success of this easy step is exponentially better than mucking out gunk from your bag and wasting tons of money on product. Bon voyage!!!


Thanks for reading!~ Leigh