Showing posts with label Leigh. Show all posts

Sunday, February 10, 2013

Making your Freshly Cut Parsley and Cilantro Last!

I love fresh herbs in cooking. They are so versitile, flavorful, and the add so much for so little calories. If you live in a high rise in a town called, "The Windy City" you will learn that window boxes and wind chimes are things you can never have... no matter how much you like them.

The only thing WRONG with fresh herbs is how much I hated throwing them away after they had dyed from being smushed under a cucumber in my crisper drawer after 4 days. So, whatcha gonna do? You find a trick to keep store bought herbs fresher... LONGER.


Freshly-cut, Store bought Parsley and Cilantro
Freshy fresh, unwashed Cilantro and its beautiful pal, Parsley.
Just like flowers, the sooner you place them in water after cutting them the better. Store bought herbs, like flowers, need water, too. The quicker you can get your herbs into water, the better... but there have definetely been times that I've thrown them in the crisper draw for a few hours while I had some tea and tried to forget going to the grocery store in the rain.

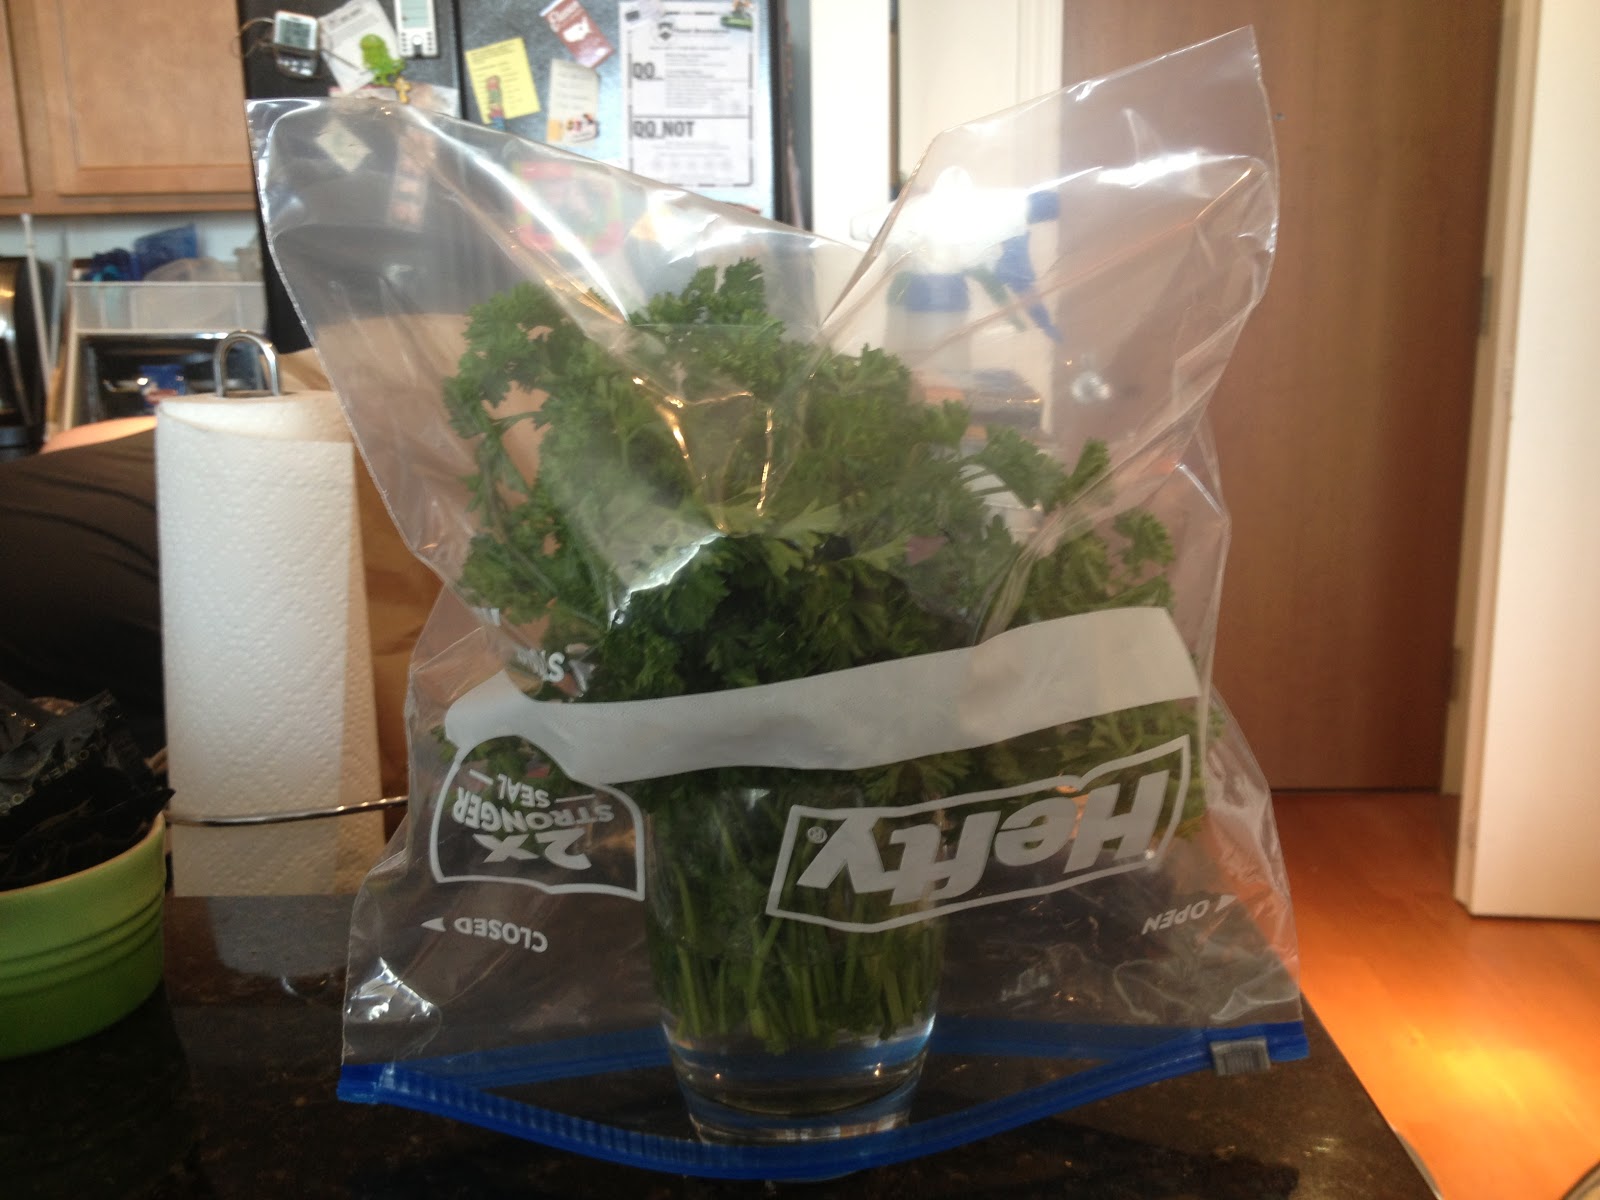
Simply get an appropriately sized glass and fill it a little under halfways with cool water and place herbs in water. Then, you gently cover it- like a tent- with a gallon-sized plastic bag. This creates a self-sustaining ecosystem that only requires you to change the water weekly.


Mini Greenhouse for Freshly-Cut Store bought Parsley
Parsley + glass + water+ ziploc bag = mini greenhouse!

One a week, however, uncover, remove herbs from glass, remove any unsightly herbs, replace cold water, and resituate herbs in glass with plastic covering. Writing about it is taking longer than it actually takes to do this simple process which will keep fresh parsley and cilantro in your house for two weeks.


Freshly Cut Herbs Last: Countertop Parsley
Happy, Steamy, Countertop Parsley!


Making Cilantro last: Mini Refridgerated greenhouse
Happy, Steamy, Refridgerated Cilantro!


One last note, the parsley thrives in room temperatures, while the cilantro loves the cooler temperatures of the fridge.
                            Thanks for reading, and good luck!~ Leigh

Baked. Brie. Bites.


Baked. Brie. Bites. Baked... Brie... Bites. I love all of these words individually, but really like when
they all come together in one thing. For just about any recipe, I like to have the end results always outweigh the amount of effort I've put in. And sometimes complicated doesn't always equal delicious.

Complicated ≠ Delicious

This recipe takes 10-15 minutes to assemble and roughly the same time to bake.. and they are always the first things to disappear on an appetizer tray.

I found this on Pinterest, of course. And the link takes you to a blog post by a food blogger called Plain Chicken. The post was a review of cheeses they'd gotten and within it was the original recipe for Baked Brie Bites. I've made this for three parties in the last year and have modified it because I will do anything to make something awesome easier, quicker, and faster.


Baked Brie Bites Ingredients
Sometimes Basic Ingredients are the best!

Ingredients:
-Mini fillo shells
-Brie Cheese- whatever you can find, cheap/expensive, rined/unrinded
-Brown sugar
-Chopped pecans
-Honey


Baked Brie Bites Cubed Cheese and Pastry
See how clean!

The mini fillo shells already come in this great plastic tray, so I just do all the assembly with the shells in their tray. I find it makes clean up easier as any spilled ingredients are in the tray that you are going throw away, anyways.

Now, like in all things, you have choices. This is one of those moments. You can choose to keep the rind on your brie or remove it. I'm in the removing it camp, but some people like their rind. To them, its part of their taste association. And, lets be honest, I'll eat brie anyway I can get it... but, for my preference, I de-rinded that sucker. Then you cut the brie into cubes and fill the fillo shell with as much cheese as you like. Since the cheese will melt later, it will fill in the bottom of your shell nicely.


The next few steps are just about applying your toppings The recipe suggests that you apply 1/4-1/2 teaspoon of brown sugar to each cup. Unless its new, my brown sugar is almost always hard to some degree. And in the past, I've gotten brown sugar chunks all over the place in this "application" process.

I discovered my next trick by accident. I put about a cup of brown sugar into a ramiken covered by a wet papertowel in the microwave for 45 seconds to soften it so I could distribute with a teaspoon. The moisture from the papertowel not only softened my brown sugar, but it melted it all together... which turned out to be a great thing as now I could apply the brown sugar in a more controlled way by drizzling it over the bites. Be careful with melted sugars and caramels... because, if you didn't know, they have a surface temperature hotter than the sun.

But, the clean up benefits of this step outweigh the mess of distributing sugar crystals to 32 individual cups. See the below side-by-side comparison. The left side is the melted version with the right side being dry, brown sugar.
Baked Brie Bites Drizzeld Vs. Dry Brown Sugar
Side by Side comparison! Boom. You've been scienced.
Next you apply the chopped pecans. I guess you could use any nut of choice but I'm a sucker for pecans. Just like the brown sugar, you just evenly distribute the chopped pecans onto your bites. I gently push them into the soft cheese so they dont fall off or move in transit. And once you apply your pecans, you just lightly drizzle the entire bite with the freshest honey you can find.


Baked Brie Bites Before
Before!
Then place a piece of parchment paper on a cookie sheet and transfer shells to cookie sheet. Bake at 350 degrees for 10-12 minutes... I try and keep an eye on these just to make sure they don't get too burney.

After they've cooked, let them cool for a minute, but these are best soon out of the oven. Dont get me wrong, they are almost as good a few hours later... but like most melty things, they are best at their peak meltiness.

Remove from the parchment paper, plate them to your liking, and watch 'em fly.


baked brie bites finished
After!
 
                                                                  Thanks for reading!~ Leigh


Tuesday, January 22, 2013

Cling Wrap to Prevent Toiletry Explosions while Traveling!

I travel (by plane) more than some, but not as much as others. I can't count the number of times that the changes in altitude or general jostling of baggage handlers have made beauty products (shampoo, body gel, etc.) explode in my bag. Because of this, I've been tightening my lids, saying a prayer, and then bagging all my stuff in ziploc bags for years. Bagging your stuff prevents product from getting all over your clothes and stuff... but it doesn't prevent wasting product or the general mess of having a ziploc bag and all of its contents covered with conditioner. So, this may SEEM like a no brainer, but I hadn't put it together until I saw a post on Pinterest and NOW I wont travel without doing simple, simple trick- Saran Wrap (or any other clear, cling wrap).


Just unscrew the top, place saran wrap over the opening, and then screw it back up. Initially, I was worried that the lid wouldn't screw back on right with the saran wrap covering the treads, but I was completely proved wrong. When you arrive at your destination, you just remove the cling wrap... save it, and you can use it on your return trip. You don't need a TON of cling wrap... just enough... but, MAN the success of this easy step is exponentially better than mucking out gunk from your bag and wasting tons of money on product. Bon voyage!!!


Thanks for reading!~ Leigh

Free Your Mind! ~Leigh


annplified.com
Although I know the aside quote to be true, it is something I struggle with often. I have to conciously tell myself that my life story is exactly that- MY life story. It isn't my friend's life, my parent's life, or the random Facebook friend from second grade's life... it's mine. It is MY timetable and my journey.

People may have things you want and be at places in their life where you want to be... and that is alright. Be happy for them. These things will come to you if they were meant to come to you. But your journey is filled with different characters, experiences, memories, and factors that make YOUR life unique... and never comparable.

Why compare where you are in life to where anyone else is in their life? There has never been anyone like YOU before- no one before you, or since you, will be a culmination of everything that YOU bring to the table.

I write this because I am writing to myself, as well as the world. All of the above statements are things I know, in my heart, to be true, but sometimes it isn't an easy pill to swallow. I see people who are: married, have kids, are more advanced in their career, have schmancy homes, or a laundry list of other descriptives... and they are at COMPLETELY different phases in their life while being the same age as me. I struggle with jealousy, insecurity,fear, doubts... but I have to remind myself that so does everyone else. Everyone else is ALSO on their own journey.

I guess the lesson here is be nice to everyone. Don't judge- either others OR YOURSELF! You never know what is in store on YOUR adventure.

Artwork from graphic designer www.annplified.com