Showing posts with label easy. Show all posts

Sunday, February 10, 2013

Making your Freshly Cut Parsley and Cilantro Last!

I love fresh herbs in cooking. They are so versitile, flavorful, and the add so much for so little calories. If you live in a high rise in a town called, "The Windy City" you will learn that window boxes and wind chimes are things you can never have... no matter how much you like them.

The only thing WRONG with fresh herbs is how much I hated throwing them away after they had dyed from being smushed under a cucumber in my crisper drawer after 4 days. So, whatcha gonna do? You find a trick to keep store bought herbs fresher... LONGER.


Freshly-cut, Store bought Parsley and Cilantro
Freshy fresh, unwashed Cilantro and its beautiful pal, Parsley.
Just like flowers, the sooner you place them in water after cutting them the better. Store bought herbs, like flowers, need water, too. The quicker you can get your herbs into water, the better... but there have definetely been times that I've thrown them in the crisper draw for a few hours while I had some tea and tried to forget going to the grocery store in the rain.

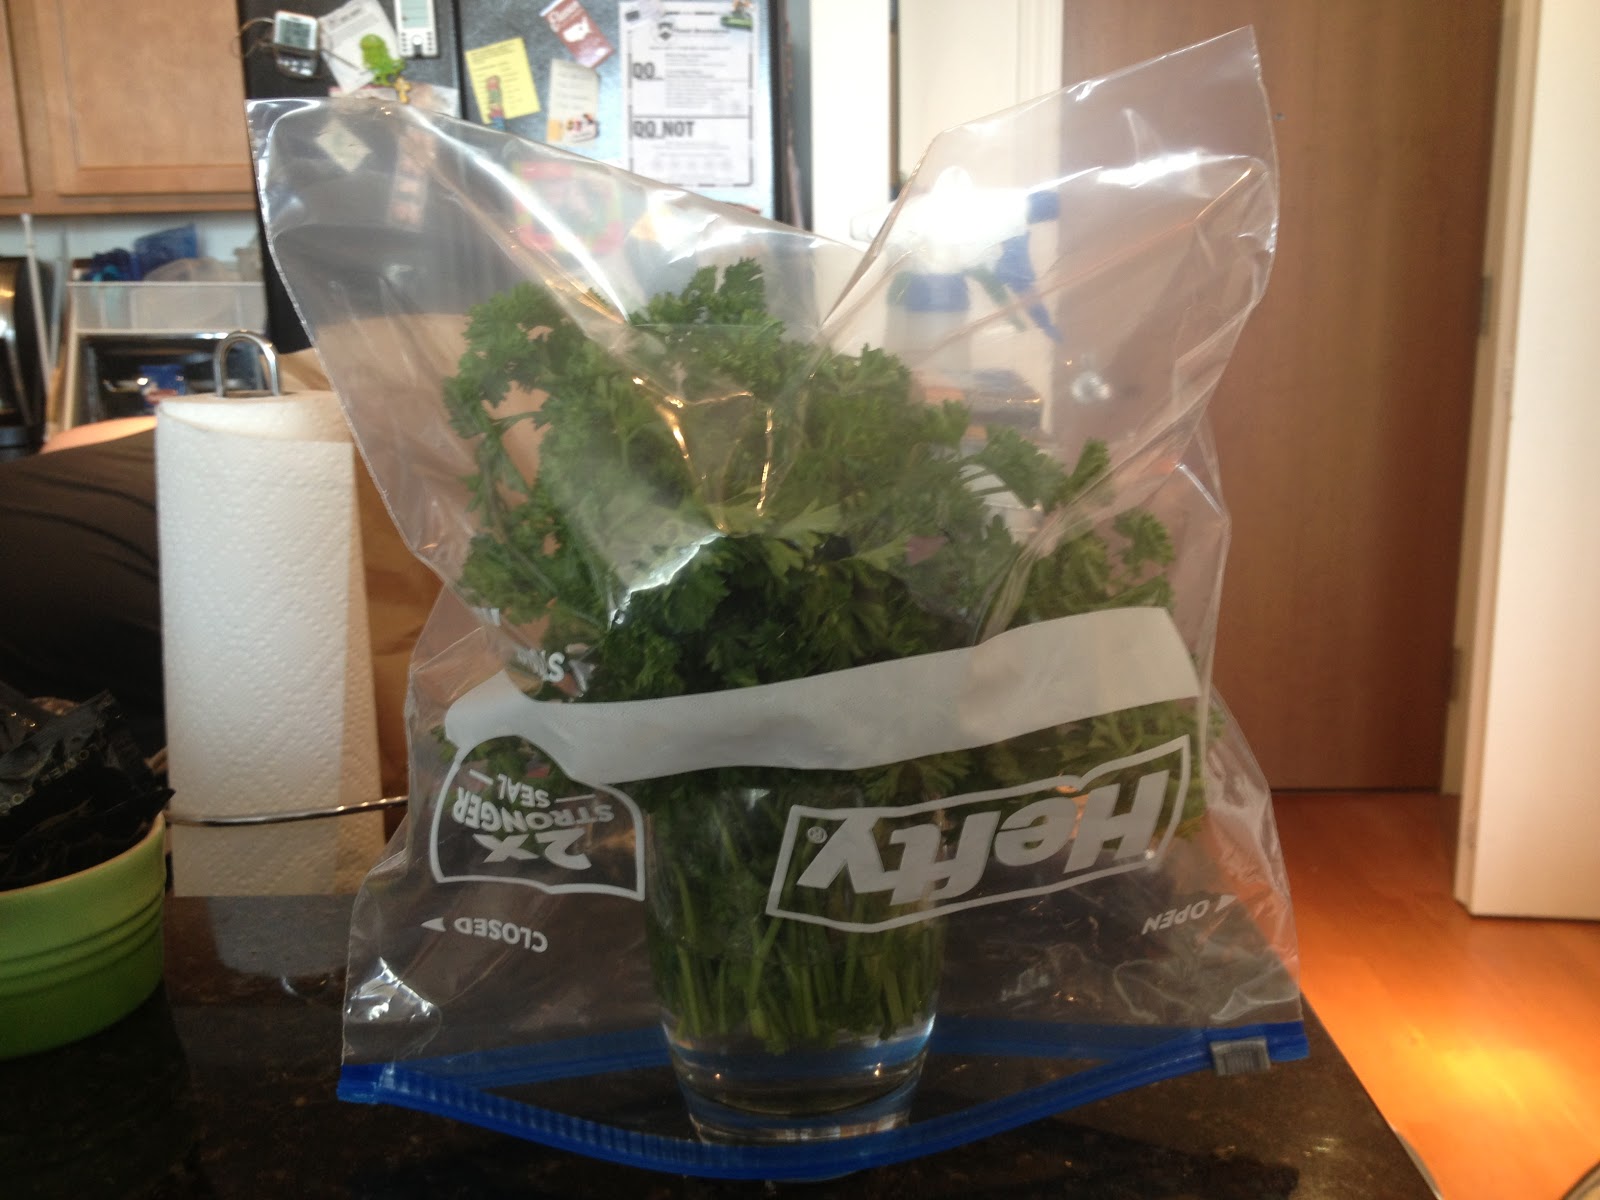
Simply get an appropriately sized glass and fill it a little under halfways with cool water and place herbs in water. Then, you gently cover it- like a tent- with a gallon-sized plastic bag. This creates a self-sustaining ecosystem that only requires you to change the water weekly.


Mini Greenhouse for Freshly-Cut Store bought Parsley
Parsley + glass + water+ ziploc bag = mini greenhouse!

One a week, however, uncover, remove herbs from glass, remove any unsightly herbs, replace cold water, and resituate herbs in glass with plastic covering. Writing about it is taking longer than it actually takes to do this simple process which will keep fresh parsley and cilantro in your house for two weeks.


Freshly Cut Herbs Last: Countertop Parsley
Happy, Steamy, Countertop Parsley!


Making Cilantro last: Mini Refridgerated greenhouse
Happy, Steamy, Refridgerated Cilantro!


One last note, the parsley thrives in room temperatures, while the cilantro loves the cooler temperatures of the fridge.
                            Thanks for reading, and good luck!~ Leigh

Baked. Brie. Bites.


Baked. Brie. Bites. Baked... Brie... Bites. I love all of these words individually, but really like when
they all come together in one thing. For just about any recipe, I like to have the end results always outweigh the amount of effort I've put in. And sometimes complicated doesn't always equal delicious.

Complicated ≠ Delicious

This recipe takes 10-15 minutes to assemble and roughly the same time to bake.. and they are always the first things to disappear on an appetizer tray.

I found this on Pinterest, of course. And the link takes you to a blog post by a food blogger called Plain Chicken. The post was a review of cheeses they'd gotten and within it was the original recipe for Baked Brie Bites. I've made this for three parties in the last year and have modified it because I will do anything to make something awesome easier, quicker, and faster.


Baked Brie Bites Ingredients
Sometimes Basic Ingredients are the best!

Ingredients:
-Mini fillo shells
-Brie Cheese- whatever you can find, cheap/expensive, rined/unrinded
-Brown sugar
-Chopped pecans
-Honey


Baked Brie Bites Cubed Cheese and Pastry
See how clean!

The mini fillo shells already come in this great plastic tray, so I just do all the assembly with the shells in their tray. I find it makes clean up easier as any spilled ingredients are in the tray that you are going throw away, anyways.

Now, like in all things, you have choices. This is one of those moments. You can choose to keep the rind on your brie or remove it. I'm in the removing it camp, but some people like their rind. To them, its part of their taste association. And, lets be honest, I'll eat brie anyway I can get it... but, for my preference, I de-rinded that sucker. Then you cut the brie into cubes and fill the fillo shell with as much cheese as you like. Since the cheese will melt later, it will fill in the bottom of your shell nicely.


The next few steps are just about applying your toppings The recipe suggests that you apply 1/4-1/2 teaspoon of brown sugar to each cup. Unless its new, my brown sugar is almost always hard to some degree. And in the past, I've gotten brown sugar chunks all over the place in this "application" process.

I discovered my next trick by accident. I put about a cup of brown sugar into a ramiken covered by a wet papertowel in the microwave for 45 seconds to soften it so I could distribute with a teaspoon. The moisture from the papertowel not only softened my brown sugar, but it melted it all together... which turned out to be a great thing as now I could apply the brown sugar in a more controlled way by drizzling it over the bites. Be careful with melted sugars and caramels... because, if you didn't know, they have a surface temperature hotter than the sun.

But, the clean up benefits of this step outweigh the mess of distributing sugar crystals to 32 individual cups. See the below side-by-side comparison. The left side is the melted version with the right side being dry, brown sugar.
Baked Brie Bites Drizzeld Vs. Dry Brown Sugar
Side by Side comparison! Boom. You've been scienced.
Next you apply the chopped pecans. I guess you could use any nut of choice but I'm a sucker for pecans. Just like the brown sugar, you just evenly distribute the chopped pecans onto your bites. I gently push them into the soft cheese so they dont fall off or move in transit. And once you apply your pecans, you just lightly drizzle the entire bite with the freshest honey you can find.


Baked Brie Bites Before
Before!
Then place a piece of parchment paper on a cookie sheet and transfer shells to cookie sheet. Bake at 350 degrees for 10-12 minutes... I try and keep an eye on these just to make sure they don't get too burney.

After they've cooked, let them cool for a minute, but these are best soon out of the oven. Dont get me wrong, they are almost as good a few hours later... but like most melty things, they are best at their peak meltiness.

Remove from the parchment paper, plate them to your liking, and watch 'em fly.


baked brie bites finished
After!
 
                                                                  Thanks for reading!~ Leigh


Tuesday, February 5, 2013

Sweet Potato Casserole- Good for Your Soul.

If I could, I would eat sweet potato casserole every day of my life. I love it. Let me be clear though, I am not talking about the one with marshmallows. You can keep those marshmallows! I am talking about the one with the brown sugar/ butter/ flour and sometimes pecan topping.

Mary Made It!
Used to, I got it twice a year: Thanksgiving and Christmas. But all that changed when I took an interest in cooking and figured out that it is really not that hard to make. So now, we have it once every 6 weeks or so- I think that is often enough to not feel deprived and yet not so often that having it looses its special-ness. Also, I have to say, being as it's my favorite I know a good sweet potato casserole when I taste it: they are not all created equal. My Moma's recipe is one of the best and it really is easy to make (and it's in her cookbook).

There are two parts to the recipe, the sweet potatoes and the topping. Here is a list of all the ingredients for the sweet potatoes.

  • 6 cups cooked, mashed sweet potatoes 
  • 2 cups granulated sugar
  • 4 eggs, beaten
  • 2 teaspoons vanilla
  • 1 stick (1/2 cup) melted butter 
and for the topping

  • 1/2 cup brown sugar
  • 3/4 cup flour
  • 1/2 cup butter
  • 1 cup pecans, chopped

sweet potato casserole ingredients

Now, I would like to speak on what to do to get your sweet potatoes cooked and mashed. You can used canned but fresh is better and you can boil them, but baked is better. What my Moma does (and what I do) is line a cookie sheet with foil and bake them on 400 F until they are soft. Depending on how many you are cooking, depends on how long it takes. I usually bake a bunch of them, mash them and freeze the extra. Once they are baked, the skins will just peel off much easier than peeling them with a potato peeler. And also, they need to be pureed in a food processor so that the strings in them are destroyed.

Once you have your sweet potatoes pureed in the food the processor, combine all the sweet potato ingredients being mindful that if you put eggs in hot sweet potato puree you will have a mess, so let them cool a bit before you combine them. Once combined place the mixture in a greased 9 x 13 Pyrex.
Sweet Potato Puree
For Bub and I, I halved the recipe and put it in Corning ware. And then I mixed up the sweet potato casserole topping. This time, I left out the pecans- trust me, either way, it's excellent!
Sweet Potato Casserole Topping
And sprinkled it on top. I did not half the topping recipe because I like a lot!
sprinkled it on top
Cook it on 350 F for 30 minutes or until the topping is nice and brown (rather than tan).
Yum! Enjoy!

So, here's the recipe in full:


  • 6 cups cooked, mashed sweet potatoes 
  • 2 cups granulated sugar
  • 4 eggs, beaten
  • 2 teaspoons vanilla
  • 1 stick (1/2 cup)
Puree sweet potatoes in a food processor and combine all ingredients and place in a greased 9 x 13 Pyrex. Combine the following ingredients and crumble on top of casserole. Bake on 350 F for 30 minutes.


  • 1/2 cup brown sugar
  • 3/4 cup flour
  • 1/2 cup butter
  • 1 cup pecans, chopped


Thursday, January 24, 2013

Best and Easiest Feta Cheese Dip: Everythings Betta with Feta!... assuming you like Feta cheese, that is... ~Leigh

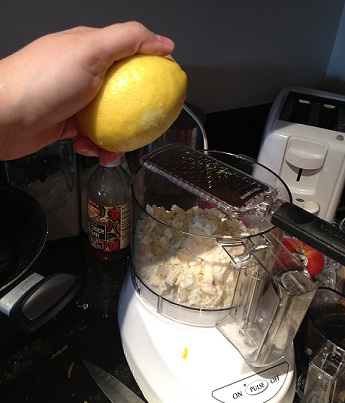
I found a pin on Pinterest that was titled, "Feta Dip" with "Everyone begs for the recipe" in the descriptor section. Everyone has different tastes, and Feta (like cilantro) is polarizing. I, personally, really like it and am always looking for a super easy something to whip up to take to knitting night, or any gathering. It doesn't get much easier than this, folks... especially if you have a food processor. The pin took me to a site called Sweet Paul Blog. You literally just dump all the ingredients into a blender or food processor and adjust to taste.


Easy Feta Cheese Dip
Through 'em all in and go!

From Sweet Paul Blog:
Lemon and feta dip
Serves 4

8oz feta cheese, crumbled
1 tablespoon grated lemon zest
2 tablespoons lemon juice
1 clove garlic, chopped
6 tablespoons olive oil+ extra for serving
fresh thyme


Place feta, lemon zest and juice, garlic and olive oil in a blender and blend until smooth.
Spoon into a bowl and drizzle with a little olive oil and sprinkle with thyme.
Serve with grilled tomatoes and grilled pita bread drizzled with olive oil, salt and thyme.


We have a policy in our house to pretty much double the garlic in any recipe and I used a little bit extra olive oil than the recipe calls for... so, again... this can be modified to suit YOUR tastes. I also didn't have any fresh thyme, though I bet that would be wonderful. I also didnt serve with grilled tomatoes... but I did serve it with pita chips. It was a super hit. And, yes... people asked for my recipe.

One quick note though... make sure to remove any lemon seeds that may have made their way in there during the squeezing process. I'm sure thats a no-brainer, but I'm just throwing that out there. If you have even a passing fondness for Feta, you should definetely check this out!

Thanks for reading!~ Leigh