Thursday, January 31, 2013

Powerhouse Spinach & Fruit Smoothie

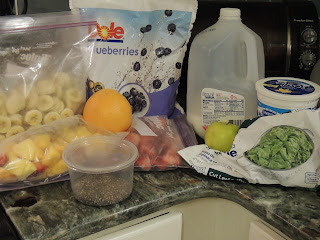
It started as an easy way to get a serving of spinach because even though I know it is good for me, spinach is not my favorite. This smoothie has turned into something I look forward to everyday. Really, you can put anything in it you like or leave out anything you don't like. I do not have an exact measurement for all the ingredients- I just eyeball them as I add to the blender- all roughly 1/2 cup. Here is my list of ingredients:

  • Spinach
  • Orange
  • Apple
  • Banana
  • Strawberry
  • Blueberry (1/4 cup-ish)
  • Pinapple/Peach/Mango Medley
  • Vanilla Flavored Greek Yogurt
  • Milk 
  • Chia Seeds (1 tablespoon)


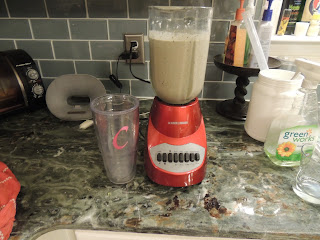
Smoothie Ingredients

I begin with putting the Greek yogurt, milk, spinach and orange in the blender first and blending them. You can leave the Greek yogurt out, but it's loaded with protein. You can use another liquid besides milk like Sprite or Sprite Zero. Then I add one or two ingredients at a time and blend them until finally it is all blended together and I have a blended fruit smoothie. If I have more than will fit in my cup, I save it for later. This time of year, I am using a lot of frozen foods- but, it turns out great.

blended fruit smoothie

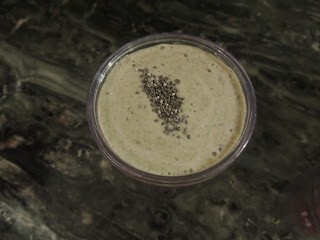
The final step is to sprinkle chia seeds on top and mix them in with my spoon.

chia seeds

You should try this powerhouse spinach and fruit smoothie- it is wonderful. I have turned my Moma and my Daddy into believers. I can even get Bub to drink a little every now and then!


Peanut Butter/Honey Balls- Don't mind if I do!

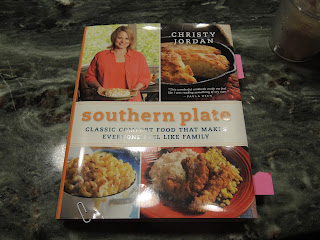
There is is this woman named Christy Jordan from North Alabama and she can cook! She has published a wonderful cookbook that is a great addition to any library. My Aunt Martha turned my Moma onto her who in turn turned me onto her. We have all enjoyed her cookbook, Southern Plate.

Southern Plate


I was flipping through it the other night looking for some inspiration when I came across her recipe for Peanut Butter Balls. She had my full attention at peanut butter. I love it! and I generally love any and everything to do with it. It just so happened that my grandmother had given me a jar of honey, so this recipe had my full attention. Moma has been telling me how good for you honey is and I knew this would be the perfect opportunity to consume honey.

Here's what the recipe calls for

  • 2 cups of honey or corn syrup
  • 3 cups creamy peanut butter
  • 5 cups dry milk powder
  • 6 cups quick-cooking oats
Peanut Butter and Honey Balls ingredients

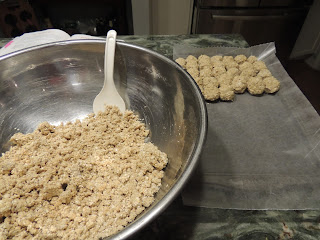
And here are the directions: Mix it all together with a mixer, form it into balls, freeze it on wax paper-lined cookie sheets and then store in a Zip Loc in the freezer.

Peanut Butter and Honey Balls

First of all, these little suckers are delish. Second, they are healthy. Third, they are very addicting. The only things I will do differently next time, will be to nuke the peanut butter for a bit to get it easier to mix it all together and I will make my peanut butter ball a little bit smaller. This time, they are roughly the size of golf balls, which is a little too big. They are good out of the freezer, but because mine are so big, they are kinda hard to eat- I have taken to filling a smaller Zip Loc with them and leaving them out of the freezer and snacking on them at room temperature.

Wednesday, January 30, 2013

A New Way to Do Pie

I have been on a diet or about to start a diet most of my life. Some diets have been very successful and others not so much. I have an unstoppable sweet tooth that tends to be the death of most of my diets. Some people prefer salty, I prefer sweet.

So, when I am dieting I am always looking for a dessert that won't ruin my diet but that will satisfy my sweet tooth. It is really a tricky situation. When I find a dessert that is both diet and delicious, I have to commit it to memory. And I have found one. No, it is not chocolate cake with chocolate icing nor is it ooey-gooey bars but, as far as diet desserts go, this one is a home-run. And it's super easy to make- to boot!

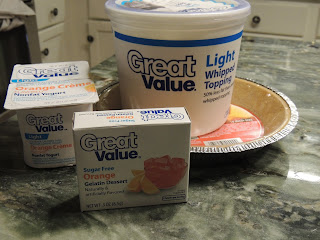
Here's what you need:


  •  Sugar Free Jell-O of your choice flavor
  • 2 (8oz) packages of Light Yogurt of the corresponding flavor
  • 1/4 cup water
  • 8oz Cool Whip
  • pie crust


Diet Pie Ingredients

This week I made an orange flavored one. I have made a key lime flavored one and a cherry flavored one. However, this week I was going for the orange Julius flavor. The first step is to bring your 1/4 cup of water to a boil on the stove-top and dissolve the jell-o in it. Add the yogurt and stir until combined.

Combine Jell-O and Yogurt

Then add the cool whip

Add Cool Whip

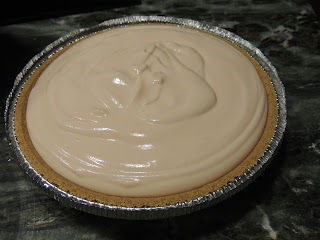
And pour mixture into the pie crust

Light and Fluffy and Awesome

And there you have it. It's just light and fluffy and awesome.


What Scratch?

I have seen several articles on the information super highway about walnuts getting rid of scratches on hard wood floors. And all I'm saying is that over a year ago some scratches appeared on the staircase. I'm not claiming to know how in the world they got there, but in all fairness, I must mention that the scratches were first noticed after this Christmas tree was drug from the attic downstairs carefully and lovingly decorated.

Christmas Tree 2011

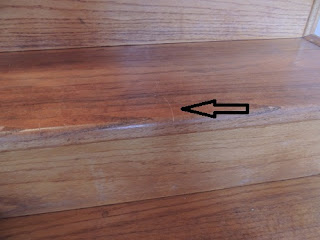
So..... I finally got my hands on a walnut and remembered to try this tip on the staircase. Here is the before picture:
Scratch

There was a blatant little scratch on every step, like maybe something was ,ahem, drug down the stairs.

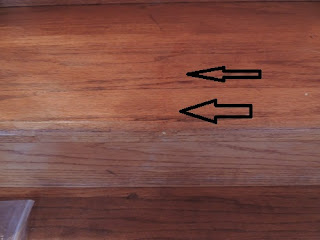
And here is the after photo:

No Scratch

Although the physical scratch did not disappear, it is really less obvious. And unless you are looking for the scratch, you are likely to never see it. I will certainly be adding this trick to my arsenal.

Breakfast Burritos is the Way We Go.

Breakfast is the most important meal of the day. It gets your metabolism rolling. To be honest, I went many years rarely, if ever, eating breakfast. I love breakfast foods- pretty much all of them but, used to, I would get up, drink a coke and smoke a cigarette and begin my day. But, (sometimes sadly) those days are over. These days, I eat breakfast every morning and I try to eat a protein and fiber heavy one at that.

One of my favorite genres of food is Mexican. Enter the Breakfast Burrito! They show up in our breakfast rotation fairly regularly. Normally, we make them and eat them. But then, I saw a couple pins on Pinterest where cooks were making a big batch and freezing them. Awesome! When it is just me in the morning, I like easy breakfasts- when Bub is at home, we usually make a big breakfast. And then, also, I try to keep things on hand for him when he had to be at work at ungodly hours. So, freezing breakfast burritos have turned out to be just the ticket. 

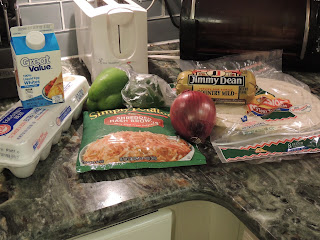
The way I was taught to cook breakfast burritos, eggs are the base and then you can add whatever you want to make them tasty to you. You can use anything- mushrooms, spinach, hot peppers, tomatoes, and number of herbs- you can even use leftovers. This is what I put in these burritos:
  • 6 eggs plus 1 cup egg whites
  • 1 pound of sausage
  • 1/2 red onion
  • 1/2 green bell pepper
  • 1 bag of hash browns (shredded)
  • Cheese!
  • flour tortillas, fajita size
Breakfast Burrito Ingredients

First, brown your sausage and cook your hash browns separately and then combine them.

Brown Your Sausage & Cook Your Hash Browns & Combine
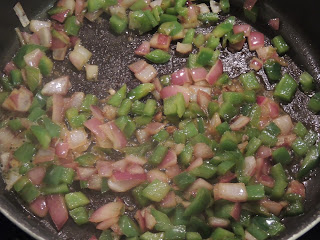
And while this is cooking, saute the onion and bell pepper.

Saute the Onion and Bell Pepper

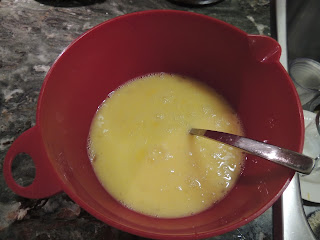
And while everything is cooking combine your eggs and egg whites.

Combine Eggs and Egg Whites

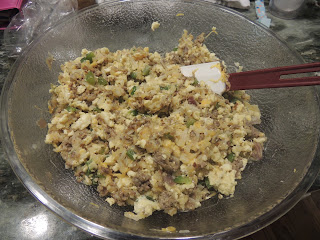
Pour the onion and bell pepper in with the sausage and hash browns and then pour the eggs over the whole of it and scramble it all together until the eggs are cooked and put the cooked mixture into a mixing bowl.

*It was at this point that I realized that I had forgotten about cheese- better late than never- so, I covered the  heaping mound of burrito innards with cheese

Cheese!

and mixed it.

Mix

Now, it's time to roll 'em up!

1 cup of mix in the middle

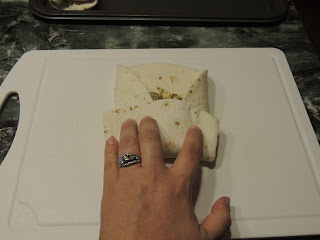
I like phattys, so I put about a cup of the mixture on the tortilla and folded in the sides:

Fold the Sides In

and rolled it forward:

Roll Forward
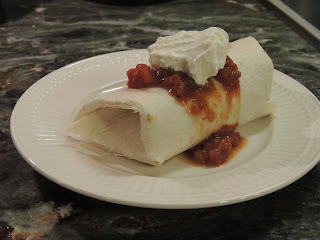
and BAM! you've got a breakfast burrito! Garnish with Salsa and Sour Cream and call it a day!

Garnish with Salsa & Sour Cream

Admittedly, I did stop at this point in the process and have one. It was great- I really hoped that the tastiness would survive the freezer. It does but, I get ahead of myself. I wrapped them individually in saran wrap and then put them in a Zip Loc bag with the warming instructions written on them: 45 seconds in the microwave then flip it over and 30 seconds more in the microwave. 


They do survive the freezer well. I told Bub, these would probably be a part of our lives forever- I can just see these being a God-send when Baby Bub starts school. Yeah, he's not even 6 months old and I'm planning school-day breakfasts. Bub, likes these- he says they stick to your bones. 

Here's the recipe:
  • 6 eggs plus 1 cup egg whites
  • 1 pound of sausage
  • 1/2 red onion
  • 1/2 green bell pepper
  • 1 bag of hash browns (shredded)
  • Cheese!
  • flour tortillas, fajita size
Brown and drain the sausage. Cook the hash browns. Saute the onion and bell pepper. Combine eggs and egg whites. Add everything together and scramble until eggs are cooked. Remove from heat and add cheese. Roll this mixture in the tortillas. Wrap individually and freeze.


Sunday, January 27, 2013

A Breath of Fresh Air for an Old Piece

It is very true, when you are pregnant- at about 7 months this nesting phenomenon kicks in and you are just overcome with a need to get everything ready for baby. I fell victim to it a little earlier because I generally have a need to have everything ready-period. I decided to put a queen bed in the nursery because I wanted to have comfortable place to sleep while I was in there. I am not sure what I was thinking- thinking that we would use Baby Bub's nursery any time soon considering it is on a different level than our bedroom.

But, in addition to his crib, I put a big bed in his room. The bed frame was my great- grandmother's; Baby Bub's great-great grandmother. I love that. That is a 5 generation span. Unfortunately, the bed frame was looking its age and I wanted to give it a little love. I debated painting it. No- it's antique. I debated refinishing it. No- for several reasons. 1. I was prego. 2. It was antique and refinishing furniture strips away its value- because it's not original. However, the bed frame needed more than a good cleaning.

My Aunt Martha to the rescue! She introduced me to Howard's Restor-A-Finish. Here is the exact description from the can: "Restor-A-Finish is a unique finish-penetrating formula that restores the original color and luster to your finish while blending out the blemishes and minor scratches. Restor-A-Finish restores the finish in one step - without removing any of the existing finish." 
Howard's Restor-A-Finish and Furniture Wax
She had used it spruce up her dining table and she thought it might be exactly what the bed frame needed. I bought mine at Home Depot. It comes in several different shades: maple, dark oak, walnut, cherry, etc. I followed the instructions and the bed frame turned out great. The Restor-A-Finish was just what the bed frame needed.

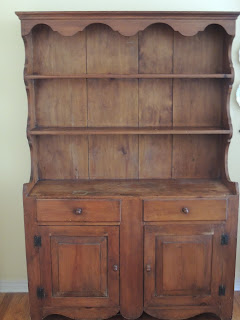
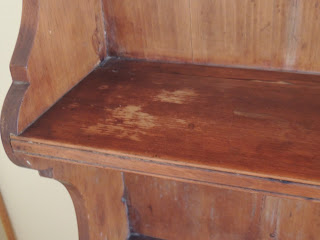
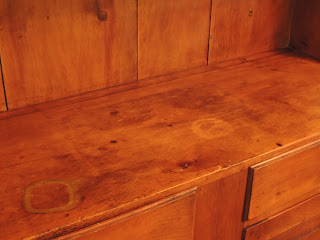
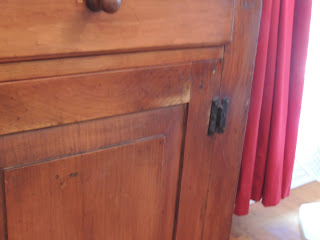
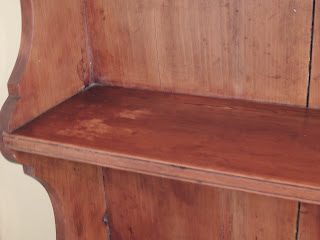
Sooooooo, when I was distressing the coffee table, I noticed that my grandmother's china hutch was in need of some attention.

Before

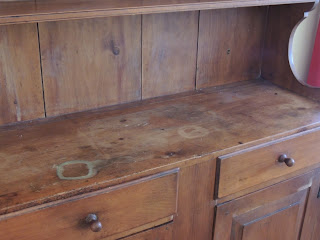
Water Marks

Stains

Faded

Restor-A-Finish to the rescue! Did I mention that Restore-A-Finish sure beats the hell out of refinishing anything! Here is a slightly abridged version of the directions: Wipe the entire piece with Restor-A-Finish but do not pour it directly on it. If you think it's necessary, repeat process and definitely finish with a furniture wax, preferably Howard's furniture wax. It is just that easy. Now, this china hutch has seen it's better days- and Restor-A-Finish is awesome but, it does not walk on water.

While the paint on the coffee table was drying, I got busy with the Restore-A-Finish on the china hutch. First I wiped the entire thing with a wet towel and then I applied just one coat of  the Restore-A-Finish and then one coat of the furniture wax, again according to the instructions. And I have to say, I was very pleased with the results. 
After

After

After

Fresh Breath


It looked like the hutch just breathed a sigh of relief like you do after a massage. Like I said, it is not a miracle worker- but, I can tell a major difference. It's like the hutch came back to life. I am very pleased with the results. I would 110% recommend anyone start with Restor-A-Finish before they refinish anything but especially an antique piece of furniture. 


No Love Lost, Distressed Coffee Table

It's all the rage and everywhere you look someone's got a piece of it or is trying to sell it. After surfing Craig's List, just looking around, and finding 10-15 pieces of distressed furniture, furniture with ugly bones, posted for sale for $300+, I thought I gotta at least try this! My target: Bub's old coffee table from his bachelor days that now lives in the living room.
Old Coffee Table

Me: "Bub, How would you feel if I painted the coffee table in the living the room?"
Bub: "That old thing? I don't care what you do with that coffee table. I think somebody gave me that coffee table or I got it from a thrift store just to have something."
Me: "How would you feel if I painted it green?"
Bub: (eyebrows raised) "Green? ...I don't care."
Me: "How would you feel if I painted it green and distressed it?"
Bub: "What does 'distressed' mean?"
                           Okay, I have to insert a time-out here- Bub is the kind of man who wears Levi's. Levi
                           501s or something. Under no circumstance would he ever wear dark wash jeans nor      
                           would he ever pay good money for a pair of jeans with a hole purposefully put in them
                           before you buy them- to him, that is just not rational. So, purposefully beating up a piece of                  
                           furniture... I was kinda pushing it.
Me: "It kinda means that it will look beat up."
Bub: "Oh. Well, yeah Babe, I don't care what you do with that coffee table."

Bub gave me the go-ahead, I didn't hesitate, I got down to business quick.

I was fortunate enough to have the perfect piece of furniture to do this to (really?)- it was just an old coffee table that had no sentimental value nor monetary value. But, you can find your perfect piece at a thrift store or off Craig's List or in a relative's attic- crappy pieces of furniture in need of a make-over are everywhere. I just thought, if I liked the outcome- great, if I didn't- no love lost. When it comes down to it, distressing furniture is easy. My friend, Kim, asked if I was gonna beat it with chains- um, no. Although the mental image of me beating the table with chains in the back yard is pretty funny.

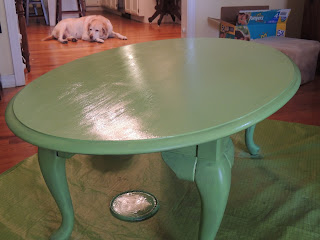
So, the first thing I did was wipe the table down with a wet towel to make sure it was clean. And then I started painting. Our green paint had primer built in- but, even if it hadn't, I would not have primed- the object is for the piece to look not perfect. The paint I used is left over from the bathroom off the den. So, just regular old wall paint. Here is the table after 2 coats.
Green Paint- Two Coats
I let is dry over night and came back and put another coat on the legs and 2 more coats on the top.
Fully Painted
The coffee table was covered, but it wasn't totally covered. It would have taken several more coats to get it completely covered and looking good- if, I was going for the perfectly painted look. But, I wasn't going for perfection. I was going for distressed. I let these coats dry for several hours and then came back with sand paper and scratched it up.
Sand Paper to Scratch it Up
Scratch it up!
And the last step I took was putting some furniture wax on it just because the paint was a bit coarse. And put it back into place.
Back into Place
Me: "Bub, you like it?"
Bub: ...
Me: "Do you get it?"
Bub: "No. But that's okay. Do you like it?"
Me: "Yeah. I'm glad it was free."
Bub: "Well, as long as you like it- that's all that matters."
Me: "I like it. I don't love it, but, I already know what I want next!"
Bub: "...Of course you do."

Like I explained to Bub, I like this table. I feel like it will be just fine until I can find the perfect coffee table I have in my mind. I enjoyed distressing it and I am pleased with the outcome. I even like the color- it adds punch to my living room. But, what I really want is a coffee table ottoman.


Saturday, January 26, 2013

You Can't Take it With You...

Have you ever gotten something like perfume or candies or champagne or even stationary that you loved so much that you wanted to save it for a special occasion? Within reason this is fine. But, have you ever used something you loved so sparingly that it ruined before you could use it all? I do all more often that I would like to admit. I have a bottle of perfume I bought almost 10 years ago- like they won't be making that for a long time to come. There is a bottle of champagne on our bar that we are saving for a special occasion- Good Lord, we had a child, does it get any more special than that? And I have stationary with my maiden name on it that I loved, but will never get used.

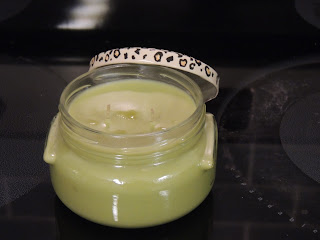
Most recently, I found myself saving a candle. Not just any candle- a Tyler Candle in my favorite scent: Entourage! I don't know what it is about that scent, but I love it. And Tyler candles are awesome candles- they smell wonderful and they last forever. They are somewhat pricey, but worth every penny. So, you might could understand why I would want to save it and not burn it just any old day--- but, really, it's a candle. An awesome candle but just a candle none-the-less. 
Tyler Candle

collecting dust


So, when I thought about that- I thought, what is the point of having things you love if you never use them. If you have nice jewelry but you never wear it or you have china that you never use- you don't get to enjoy it, what's the point of having it. Before my Grandmother died she gave some of her jewelry to family and friends because she wanted to see them wear it and enjoy it. 

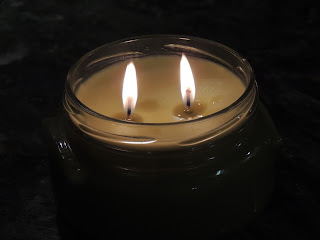
I think it is a lesson that I need to revisit. Instead of letting $20 candles sit around collecting dust, I need to burn them and enjoy them. Also, we might as well get the champagne chilled. I don't want to get caught saving stuff for so long that it ruins. I want to enjoy the stuff I love and love the stuff I have. 

Burn your Candles