Friday, February 15, 2013

Happy Valentine,s Day!

I have to say that I genuinely love holidays. I just think its fun to celebrate each one in its own way. And I particularly like sending photo cards for the holidays that we, as adults don't normally think to send cards. Everybody sends Christmas cards- hardly anybody sends Valentine's Day cards past high school (anyone remember candy grams?). My sisters and I sent out Halloween cards one year- we dressed up as three bitches witches- we had a good time doing it.

So, when Bub and I moved into our house, I decided we'd forever more send out Valentine's Day cards. It's a special holiday to us because it is our dating anniversary. We had just moved into our house and we were so excited and we even managed to get our dog, Rider, to pose too. (I say "our" but, he's Bub's dog and he has been around longer than me. I have heard Bub refer to him as Baby Bub's brother- but, the jury is still out on that!) 

                                  Valetine's 2011

And then the following year, Bub and I opted out of the Valentine focus and decided Rider would be the sole focus. He did really well as my model and muse posing for 2012's picture. It could have had something to do with the bag of treats I was using to get him to do what I wanted or it2s could have been his natural talent or a combination of both talent and being a treat loving dog!

                                              Rider 2012
And then this year we had a fresh addition to our tradition. The first round of photos were kinda awkward in that Baby Bub is not exactly old enough to take direction and the box of Russell Stover chocolates I bought was just about as big as him.
Russell Stover chocolates


And then Bub put his sad face on and reminded me that Rider had been in all our Valentines to date and he's getting old and won't be around forever... So, fine- we added Rider in the next photo shoot. Trying to get a 3 1/2 month old and a 12 year old deaf dog to pose cohesively almost took an act of Congress...


But, we got it! And it was just right! So, to everybody everywhere- Happy Valentine's Day!!! xoxoxo


Monday, February 11, 2013

Operation Red Door!

Operation Red Door

My house is a constant work in progress. There isn't a room in it that does not need something done to it,  walls painted, wallpaper removed, cabinets stained, chandelier replaced, floor replaced and the list goes on (and on). Bub and I just tackle one project at a time.

I was reading Bower Power and her post on painting her front door, when it dawned on me the front of our house needed something.
Painting the Front Door
Yes, we are a house divided. War Eagle.
It needed some lipstick! Bub agreed wholeheartedly and he even agreed it should be red. But, what red. We certainly do not have the best track record picking out paint and we even follow all the rules- going so far as to get the samples and testing them before committing to the paint color. We looked at several reds; red, NOT maroon and narrowed it down to Red Delicious by Glidden by taping paint swatches to the door.

Paint Swatches on the Front Door


Once we finalized our decision on which red, we got right down to business. First thing, Bub took the door off the hinges using a Flathead screwdriver and a hammer. He put the tip of the screwdriver at the top of the hinge and tapped the handle with the hammer causing the pin to come out of the hinge.

Off the Hinges

Our door is original to this 1985 home and when we started really looking at it, it was easy to see that this would not be its first paint job. First thing Bub removed the caulk around the leaded glass window.

removing the caulk around the leaded glass window

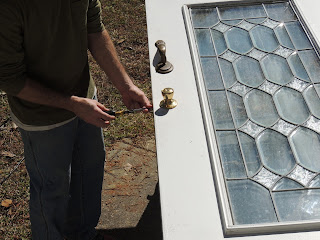
and then off came the door handles- yes, handles. I don't know nor do I understand but, the door has two handles. All there is to taking the handles off is unscrewing the screws on the side of the door.

off with the handles

And then, Bub started sanding. He didn't sand all the way down to the metal of the door- he just sanded it a bit so that the primer would be able to gain traction. It was at this point that we came to the conclusion that if we were going to the trouble of painting the door, it would still look like crud if we didn't clean between the leaded glass pane and the door window.

Sunday, February 10, 2013

Most-Delicious Crunchy Coleslaw Salad with Tangy-Sweet Dressing


Darien Telephone Company's Phenomenal Book
One of my favorite cookbooks around (besides Coralie's Mom's Awesome Cookbook: Mary Made It, of course) is  "Something To Talk About: Simply Coastal Cooking" from The The Darien Telephone Company in Darien, Georgia. The only thing better than the food in McIntosh County, Georgia is the people. Two or three of my hands-down favorite recipes come from this book and I am so pleased to share one of my most requested recipes ever.

The recipe is for "Coleslaw Salad" but I want to add a thousand words to that title to further convey its awesomeness. Because it is. When I think of coleslaw, I normally grimace... because I've had some bad coleslaw in my life. Everyone has been to that barbeque/picnic where there is a plastic container of something that is a white, mayonaissey soup with shredded cabbage.And for that reason, I think coleslaw sometimes gets a bad wrap. I mean, when done properly, mayonnaise-based coleslaw is a thing of beauty... but, again... we've all been to that barbeque.

Oh, man... I'm so excited to share this with you. I'm calling it, CRUNCHY COLESLAW with TANGY/SWEET DRESSING. I know a lot of people in my life who aren't big fans of vegetables... and even THEY eat this salad. It's great for summer parties, Wednesday-dinner sidedish, you name it.      
Ingredients:
-1 (3-ounce) package of chicken-flavor ramen noodles
-1/2 cup vegetable oil
-3 tablespoons cider vinegar
-2 tablespoons sugar
-1/2 teaspoon of salt
-1/4 teaspoon of pepper
-3 tablespoons of butter
-1/2 cup sliced almonds
-2 tablespoon sunflower kernals
-1 large head cabbage, shredded, or 1 (16-ounce) package shredded cabbage
-1/2 cup sliced green onions         

This recipe is really broken up into two parts- the crunchy portion of the salad and the dressing. If you aren't feeling ambidexterous you can make the dressing, then toast your crunchy ingredients, and then make the fresh greens portion of the salad... OR, if you love a challenge, you can do all three at the same time through a carefully orchestrated dance that maximizes time effeciency. Because sometimes you need a great dish quickly.


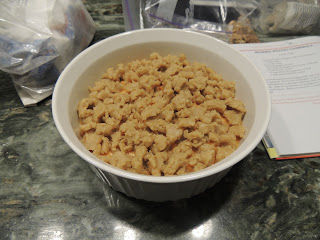
Crunchy Coleslaw Salad Saute
Is there anything better than butter?
First, put the 3 Tbls. of butter into a wide pan over a medium-low heat. ("6" on my range) After most of the butter has melted, begin putting crunchy component (almonds, sunflower seeds, and crushed noodles from the ramen noodle packet) into the sauce pan. *Tip* I always open a small section from the end seams of the noodle packet and gently crush the noodles IN the package. It just keeps the mess at a minimum. Now, as soon as the dry, crunchy ingredients get covered in melted butter you have about eight to ten minutes of toasting before they start to get burned.

Crunchy Coleslaw Salad Mixture Saute
Thin layer of crunchy goodness, sauteed frequently.
 Make sure the crunchy ingredients are spread-out as you sautee, breaking up any larger clusters of ramen noodles with the butt of your spatula. While you are stirring this mix frequently, almost obsessively, you can make your dressing. But, always ALWAYS watch this mix. Because when it starts to burn, it happens quickly. So, while its toasting, grab a mason jar and combine the dressing components (oil, cider vinegar, sugar, salt, pepper, and the most secretest of ingredients- the chicken flavoring packet from the ramen noodles). Deal with it. Tighten lid on mason jar and shake ingredients together. Set aside. You've been watching your crunchy stuff, right?
I know you have, because you're awesome. After six or seven minutes, you'll begin to notice that the almonds are starting to subtly toast. Use this as your index on doneness of your noodles. Here you can do one of two things: if your noodles look golden brown, take them immedietely off the heat and spread in a thin layer on a paper-towel covered plate to soak excess oil from component. It also slows the toasting process... which is key, as it can burn quickly. Can't state that enough. If you've made your dressing and the noodles and almonds are still the same color as when you put them in, continue to sautee mixture in butter, and cut your green onions.
 
 Now that all components are assembled, you can either mix them all together if you are serving immedietly or store the components seperately while you are traveling or until you are ready to serve. As soon as you add the dressing to the crunchy mixture, the crunch of the noodles are on a time clock. They'll stay crunchy for about an hour, once mixed, but can be stored and assembled at the event for maximum crunch. I've known some people who LOVE this salad soggy- like put it between slices of bread/LOVE this salad. I'm its biggest fan of it crunchy, but to each his own!
 
A friend of mine has a "deep-fry" party every year for his birthday- everyone brings something to deep fry- the wilder the better. I brought this salad as a palate cleanser and some needed ruffage. I carried the coleslaw bag, the crunch mixture, and the green onion in a tupperware container. Got to the party and assembled on site. I took a picture of it too late as it was almost consumed by the time I got my camera. Which, I guess, is a pretty awesome indicator of how great this it.
 
Crunchy Coleslaw with Tangy/Sweet Dressing finished
Crunchy and Crisp! Delicious and GONE.
 

   Thanks for reading, and good luck!
                                                    ~ Leigh

Making your Freshly Cut Parsley and Cilantro Last!

I love fresh herbs in cooking. They are so versitile, flavorful, and the add so much for so little calories. If you live in a high rise in a town called, "The Windy City" you will learn that window boxes and wind chimes are things you can never have... no matter how much you like them.

The only thing WRONG with fresh herbs is how much I hated throwing them away after they had dyed from being smushed under a cucumber in my crisper drawer after 4 days. So, whatcha gonna do? You find a trick to keep store bought herbs fresher... LONGER.


Freshly-cut, Store bought Parsley and Cilantro
Freshy fresh, unwashed Cilantro and its beautiful pal, Parsley.
Just like flowers, the sooner you place them in water after cutting them the better. Store bought herbs, like flowers, need water, too. The quicker you can get your herbs into water, the better... but there have definetely been times that I've thrown them in the crisper draw for a few hours while I had some tea and tried to forget going to the grocery store in the rain.

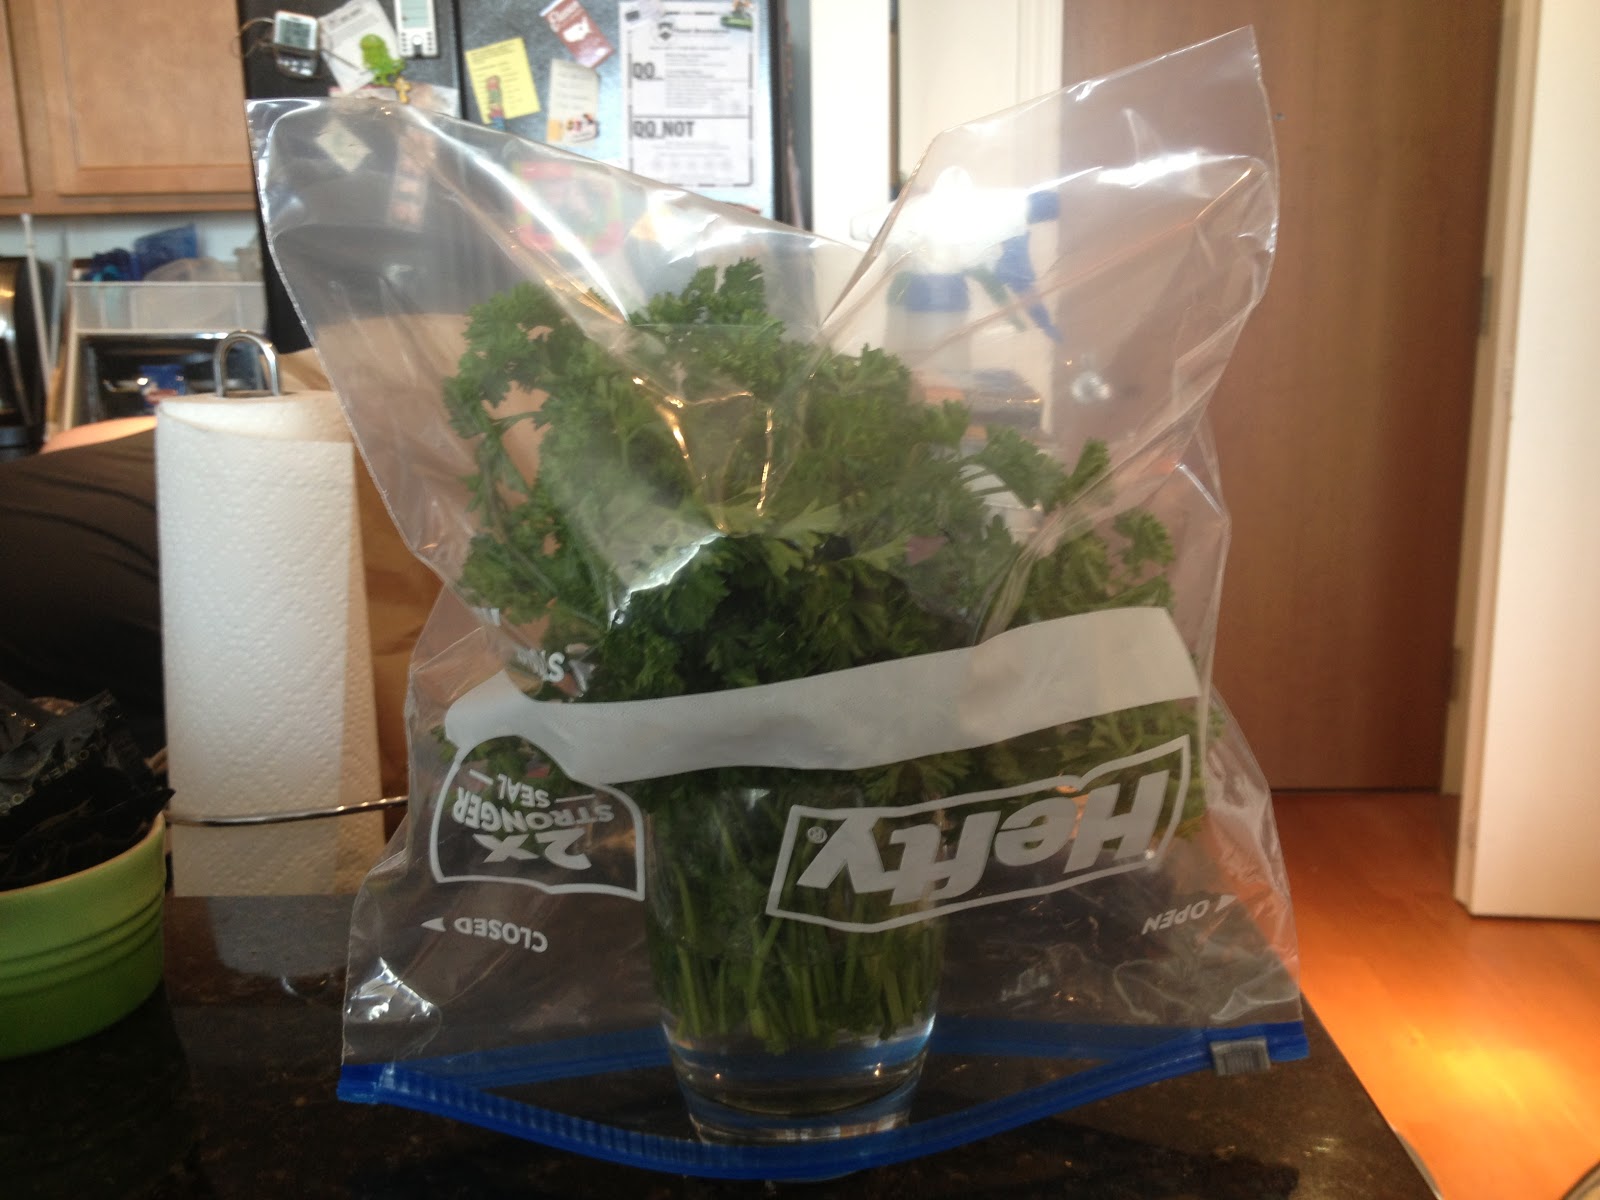
Simply get an appropriately sized glass and fill it a little under halfways with cool water and place herbs in water. Then, you gently cover it- like a tent- with a gallon-sized plastic bag. This creates a self-sustaining ecosystem that only requires you to change the water weekly.


Mini Greenhouse for Freshly-Cut Store bought Parsley
Parsley + glass + water+ ziploc bag = mini greenhouse!

One a week, however, uncover, remove herbs from glass, remove any unsightly herbs, replace cold water, and resituate herbs in glass with plastic covering. Writing about it is taking longer than it actually takes to do this simple process which will keep fresh parsley and cilantro in your house for two weeks.


Freshly Cut Herbs Last: Countertop Parsley
Happy, Steamy, Countertop Parsley!


Making Cilantro last: Mini Refridgerated greenhouse
Happy, Steamy, Refridgerated Cilantro!


One last note, the parsley thrives in room temperatures, while the cilantro loves the cooler temperatures of the fridge.
                            Thanks for reading, and good luck!~ Leigh
Baked. Brie. Bites.


Baked. Brie. Bites. Baked... Brie... Bites. I love all of these words individually, but really like when
they all come together in one thing. For just about any recipe, I like to have the end results always outweigh the amount of effort I've put in. And sometimes complicated doesn't always equal delicious.

Complicated ≠ Delicious

This recipe takes 10-15 minutes to assemble and roughly the same time to bake.. and they are always the first things to disappear on an appetizer tray.

I found this on Pinterest, of course. And the link takes you to a blog post by a food blogger called Plain Chicken. The post was a review of cheeses they'd gotten and within it was the original recipe for Baked Brie Bites. I've made this for three parties in the last year and have modified it because I will do anything to make something awesome easier, quicker, and faster.


Baked Brie Bites Ingredients
Sometimes Basic Ingredients are the best!

Ingredients:
-Mini fillo shells
-Brie Cheese- whatever you can find, cheap/expensive, rined/unrinded
-Brown sugar
-Chopped pecans
-Honey


Baked Brie Bites Cubed Cheese and Pastry
See how clean!

The mini fillo shells already come in this great plastic tray, so I just do all the assembly with the shells in their tray. I find it makes clean up easier as any spilled ingredients are in the tray that you are going throw away, anyways.

Now, like in all things, you have choices. This is one of those moments. You can choose to keep the rind on your brie or remove it. I'm in the removing it camp, but some people like their rind. To them, its part of their taste association. And, lets be honest, I'll eat brie anyway I can get it... but, for my preference, I de-rinded that sucker. Then you cut the brie into cubes and fill the fillo shell with as much cheese as you like. Since the cheese will melt later, it will fill in the bottom of your shell nicely.


The next few steps are just about applying your toppings The recipe suggests that you apply 1/4-1/2 teaspoon of brown sugar to each cup. Unless its new, my brown sugar is almost always hard to some degree. And in the past, I've gotten brown sugar chunks all over the place in this "application" process.

I discovered my next trick by accident. I put about a cup of brown sugar into a ramiken covered by a wet papertowel in the microwave for 45 seconds to soften it so I could distribute with a teaspoon. The moisture from the papertowel not only softened my brown sugar, but it melted it all together... which turned out to be a great thing as now I could apply the brown sugar in a more controlled way by drizzling it over the bites. Be careful with melted sugars and caramels... because, if you didn't know, they have a surface temperature hotter than the sun.

But, the clean up benefits of this step outweigh the mess of distributing sugar crystals to 32 individual cups. See the below side-by-side comparison. The left side is the melted version with the right side being dry, brown sugar.
Baked Brie Bites Drizzeld Vs. Dry Brown Sugar
Side by Side comparison! Boom. You've been scienced.
Next you apply the chopped pecans. I guess you could use any nut of choice but I'm a sucker for pecans. Just like the brown sugar, you just evenly distribute the chopped pecans onto your bites. I gently push them into the soft cheese so they dont fall off or move in transit. And once you apply your pecans, you just lightly drizzle the entire bite with the freshest honey you can find.


Baked Brie Bites Before
Before!
Then place a piece of parchment paper on a cookie sheet and transfer shells to cookie sheet. Bake at 350 degrees for 10-12 minutes... I try and keep an eye on these just to make sure they don't get too burney.

After they've cooked, let them cool for a minute, but these are best soon out of the oven. Dont get me wrong, they are almost as good a few hours later... but like most melty things, they are best at their peak meltiness.

Remove from the parchment paper, plate them to your liking, and watch 'em fly.


baked brie bites finished
After!
 
                                                                  Thanks for reading!~ Leigh


Saturday, February 9, 2013

Not So Nice- Not So Easy Caramel Icing...

Generally, you know what level of cook you are. You may be the kind of cook that struggles to boil water or you may be the kind that can make grass cuttings and gravel rocks taste great. I would say I am somewhere between the two. That being said, you should also be able to discern which recipes are out of your league and which ones are easy-peasy.

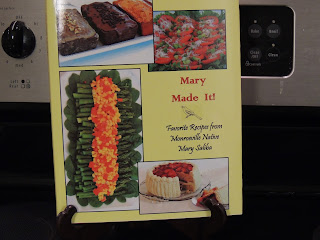
I was feeling froggy. I wanted to try a recipe just barely out of my league- after all, that's how you get better- push yourself and I had had my eye another of my Moma's recipe's from her cookbook. I wanted to try the caramel icing recipe. I mean, if done right, caramel icing is just so decadent. And I want to be a cook that can do caramel icing.

Mary Made It!

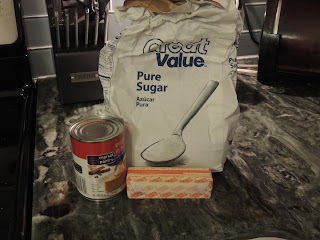
So, I took a look at the ingredients

  • 4 1/2 cups granulated sugar
  • 2 (5 ounce) cans evaporated milk
  • 1 cup (2 sticks) butter
I had them all! It was a go! I did decide to half the recipe because I only had 2 cake layers stashed in the freezer.

It was a go!

The instructions say to brown the sugar over medium heat stirring until it turns a dark caramel color.

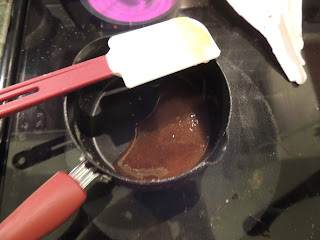
Beginning to Caramelize

Dark Caramel Color

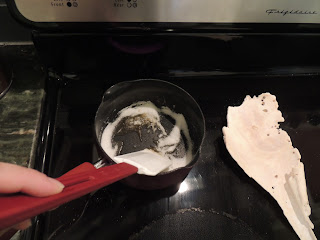
Okay, check. Then the directions say in another pot combine the other two ingredients and bring to a boil stirring constantly. This did call for a bit of ambidexterity- but, I had it going.
Evaporated Milk + Butter

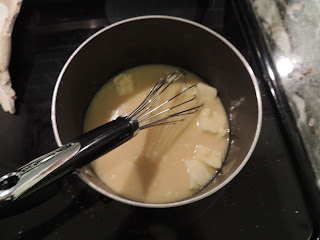
And then you add the caramelized sugar to this butter slash evaporated milk mixture and continue to cook for another 3 minutes stirring constantly. Then set it aside and let it cool for about 10 minutes... dum-dum-dum- this is when I found the specks of Teflon.

specks of Teflon

You can't really see them in this picture- but, I put it in the Zip Loc to throw away. I can't eat Teflon- even if it does taste like caramel icing.
It is at this point that I would like to tell a side story. When Baby Bub was born, one of my best friends came to take care of us. At one point, I asked her to cook me some mac n' cheese while I hopped in the shower. I just wanted some Kraft (in a blue box) macaroni and cheese. After scoffing at me and exclaiming she didn't know how to make that because she doesn't cook that, I told her to follow the directions on the side of the box. When I got out of the shower, she had it made... except she had used a metal fork to stir it in my Teflon coated pot and there were little Teflon flakes in it- oh Lord. I should have thrown that pot away then but, for some reason, I didn't. Fast forward to caramel icing and me using the whisk- and there you have it. First batch of caramel icing in the garbage. The moral of this story: keep metal utensils far, far, far away from non-stick, Teflon coating. 
After 60 seconds of loosing my grip, (did I mention I was on the phone the whole time with my Moma) I decided that this icing had not gotten the best of me! I had just enough of the ingredients to go at it again. So, I got back in the saddle, went through all the above steps and got to the part where you are supposed to let it cool for 10 minutes- almost there.

almost there

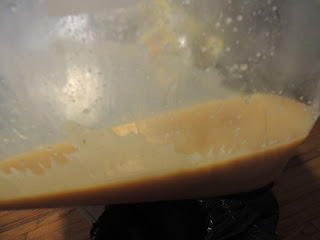
I let it cool longer than 10 minutes- closer to 20 minutes. And then I got out my hand mixer and mixed and mixed and mixed and mixed.


I seriously thought I had mixed enough but... not so much...


(Notice all the icing on the plate- it's supposed to be on the cake!)

Weeelllll, you win some and you loose some. Although the 2nd time was not the charm, I will certainly come back to this not so easy caramel icing. I will master it- someday.


Thursday, February 7, 2013

Brine Thy Swine!

There are some tricks to making sure that your meats are tasty when you sit down to eat them. Just like you marinate chicken, you need to brine your pork. Bub is the one that taught me this business about brining swine and he learned it from his brother-in-law. Bub makes the best ribs. Hands down. (More on that later) And he always brines them overnight.

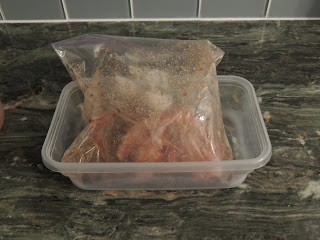
So, I applied the same principle to pork chops. Here's the deal with making a brine. It has always got to have vinegar of some sort in it. And then all the rest is just extra. Milk also helps make the meat more tender. For my brine I used
brine ingredients

  • 1/2 cup milk
  • 1/4 cup balsamic vinegar
  • 1/4 cup apple cider vinegar
  • 1/2 tbsp garlic
  • 1/2 tbsp poultry seasoning (yes, I know.)
  • salt and pepper
Pour all this in a zip loc with your pork chops and let it chill for several hours.

Set it and Forget it

When I get ready to cook them, I take them straight out and proceed with it- either to the grill or cast iron skillet or oven or whatever. In this instance, they went on the grill.

All the better because of the brine!


Tuesday, February 5, 2013

Sweet Potato Casserole- Good for Your Soul.

If I could, I would eat sweet potato casserole every day of my life. I love it. Let me be clear though, I am not talking about the one with marshmallows. You can keep those marshmallows! I am talking about the one with the brown sugar/ butter/ flour and sometimes pecan topping.

Mary Made It!
Used to, I got it twice a year: Thanksgiving and Christmas. But all that changed when I took an interest in cooking and figured out that it is really not that hard to make. So now, we have it once every 6 weeks or so- I think that is often enough to not feel deprived and yet not so often that having it looses its special-ness. Also, I have to say, being as it's my favorite I know a good sweet potato casserole when I taste it: they are not all created equal. My Moma's recipe is one of the best and it really is easy to make (and it's in her cookbook).

There are two parts to the recipe, the sweet potatoes and the topping. Here is a list of all the ingredients for the sweet potatoes.

  • 6 cups cooked, mashed sweet potatoes 
  • 2 cups granulated sugar
  • 4 eggs, beaten
  • 2 teaspoons vanilla
  • 1 stick (1/2 cup) melted butter 
and for the topping

  • 1/2 cup brown sugar
  • 3/4 cup flour
  • 1/2 cup butter
  • 1 cup pecans, chopped

sweet potato casserole ingredients

Now, I would like to speak on what to do to get your sweet potatoes cooked and mashed. You can used canned but fresh is better and you can boil them, but baked is better. What my Moma does (and what I do) is line a cookie sheet with foil and bake them on 400 F until they are soft. Depending on how many you are cooking, depends on how long it takes. I usually bake a bunch of them, mash them and freeze the extra. Once they are baked, the skins will just peel off much easier than peeling them with a potato peeler. And also, they need to be pureed in a food processor so that the strings in them are destroyed.

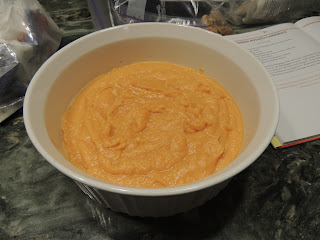
Once you have your sweet potatoes pureed in the food the processor, combine all the sweet potato ingredients being mindful that if you put eggs in hot sweet potato puree you will have a mess, so let them cool a bit before you combine them. Once combined place the mixture in a greased 9 x 13 Pyrex.
Sweet Potato Puree
For Bub and I, I halved the recipe and put it in Corning ware. And then I mixed up the sweet potato casserole topping. This time, I left out the pecans- trust me, either way, it's excellent!
Sweet Potato Casserole Topping
And sprinkled it on top. I did not half the topping recipe because I like a lot!
sprinkled it on top
Cook it on 350 F for 30 minutes or until the topping is nice and brown (rather than tan).
Yum! Enjoy!

So, here's the recipe in full:


  • 6 cups cooked, mashed sweet potatoes 
  • 2 cups granulated sugar
  • 4 eggs, beaten
  • 2 teaspoons vanilla
  • 1 stick (1/2 cup)
Puree sweet potatoes in a food processor and combine all ingredients and place in a greased 9 x 13 Pyrex. Combine the following ingredients and crumble on top of casserole. Bake on 350 F for 30 minutes.


  • 1/2 cup brown sugar
  • 3/4 cup flour
  • 1/2 cup butter
  • 1 cup pecans, chopped